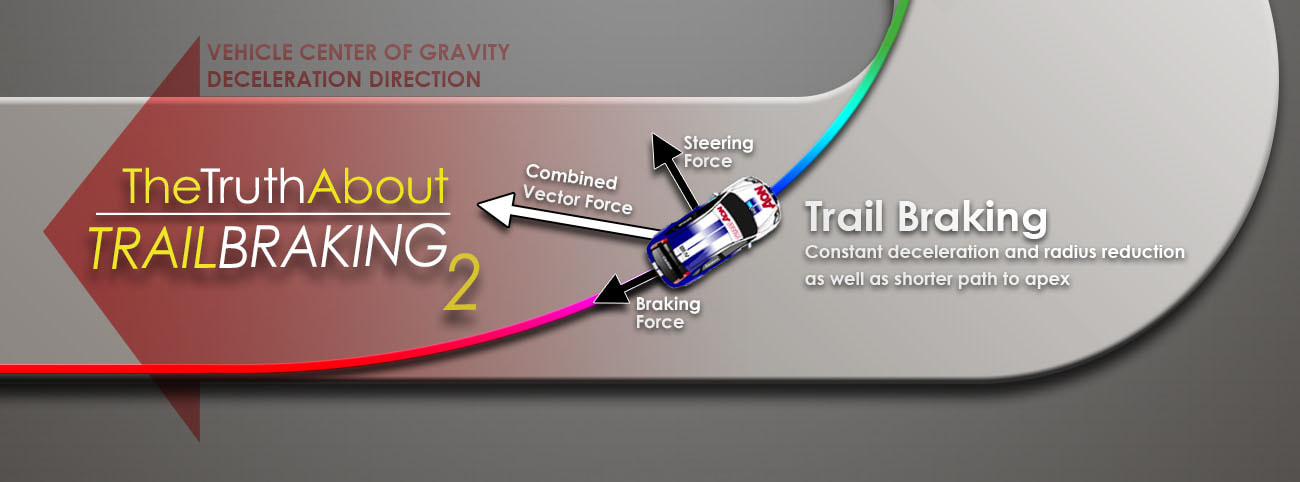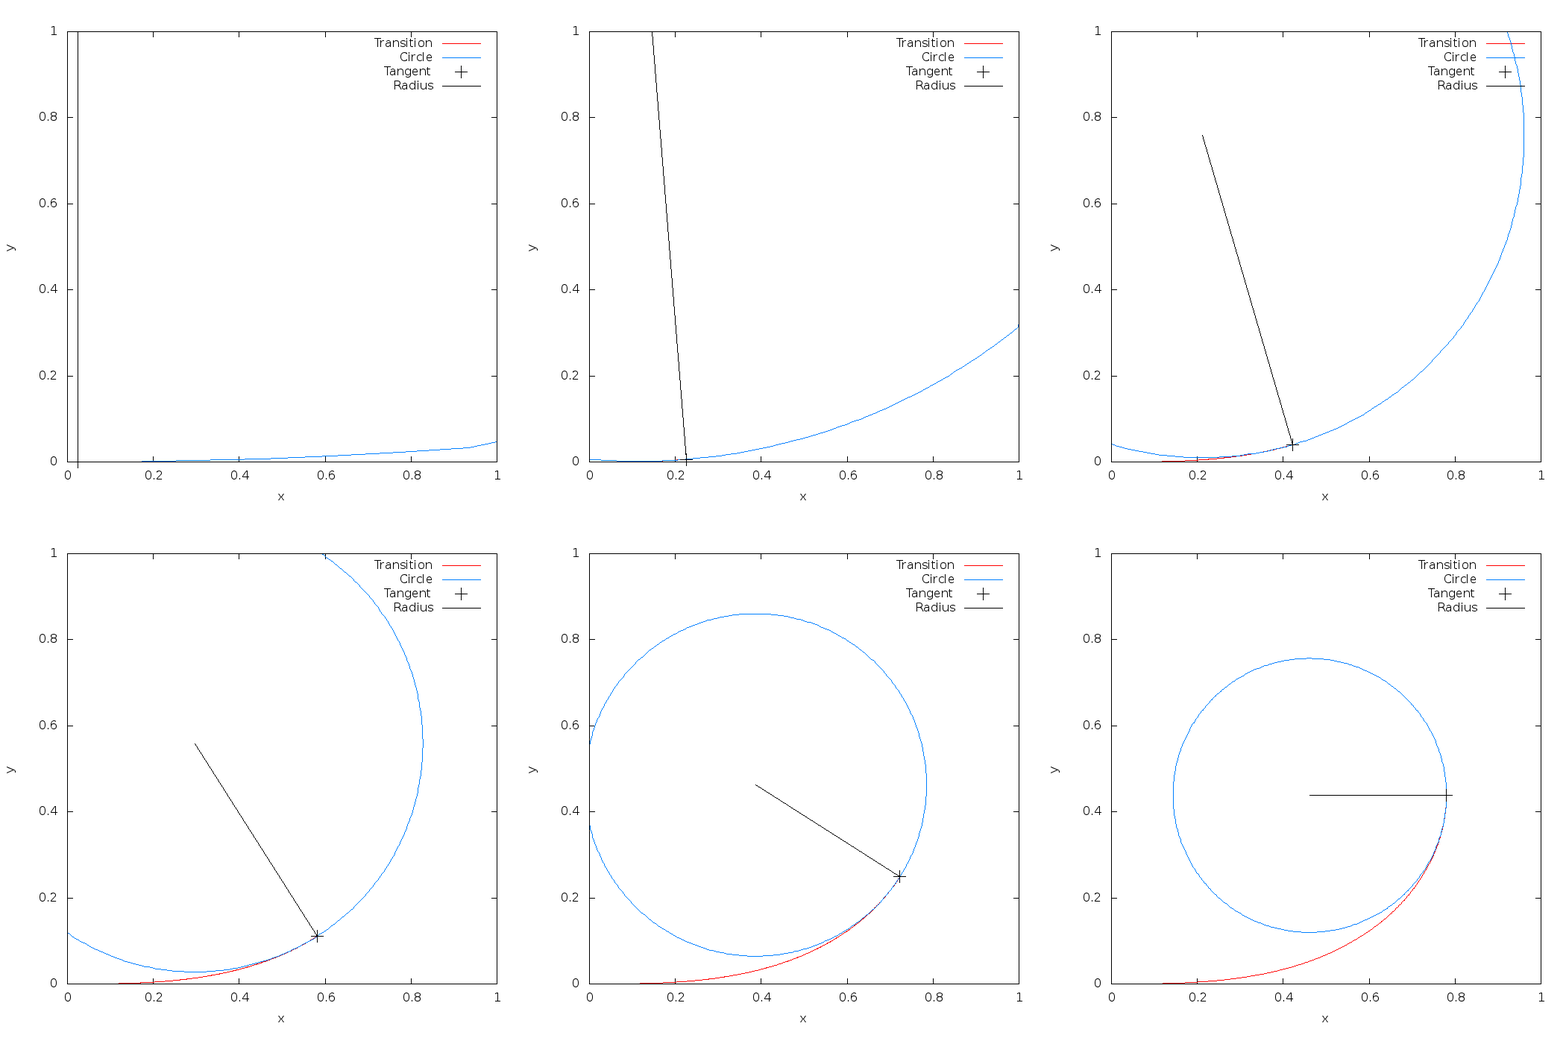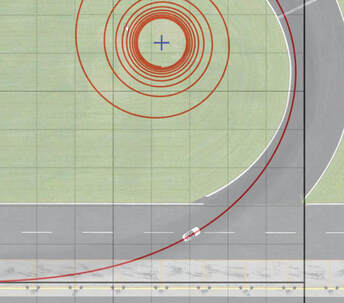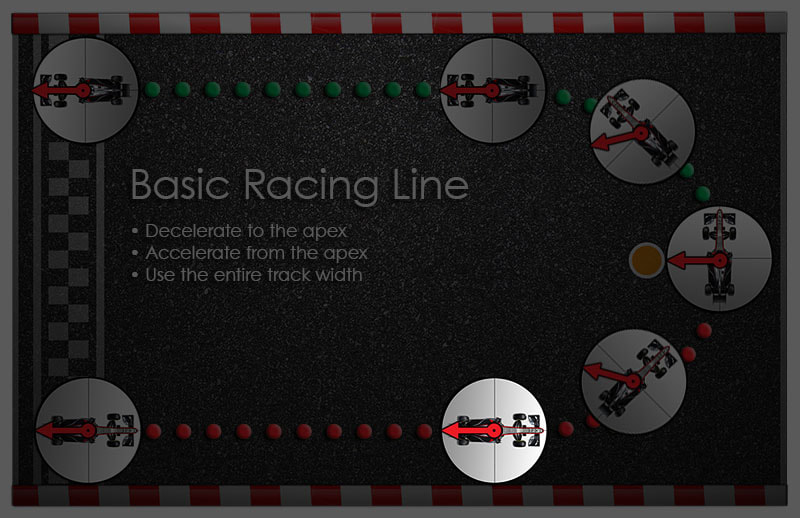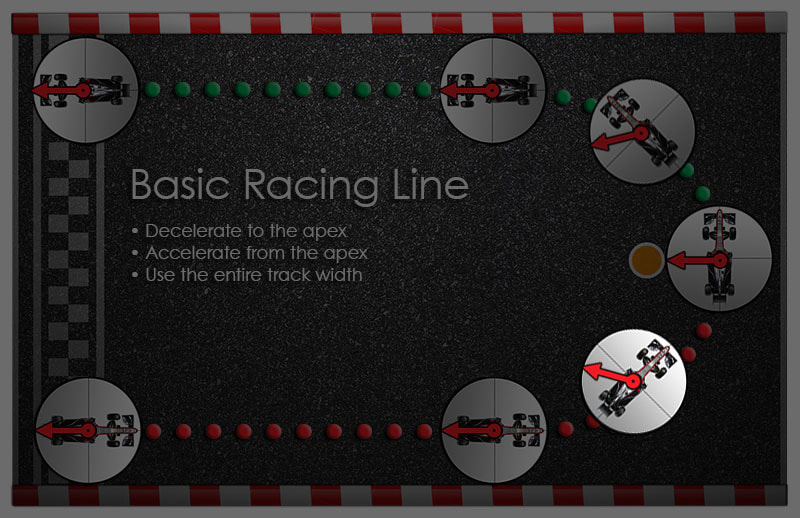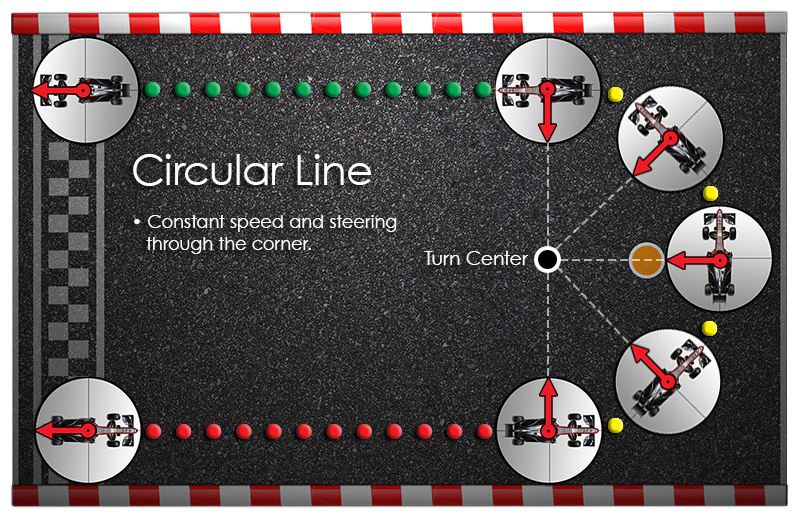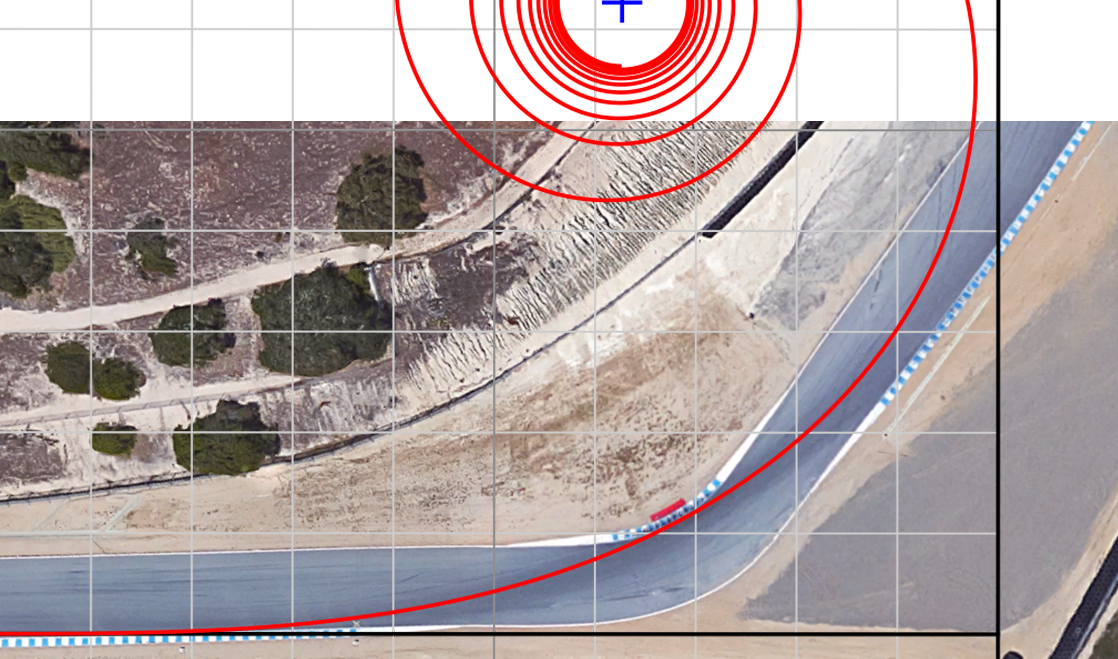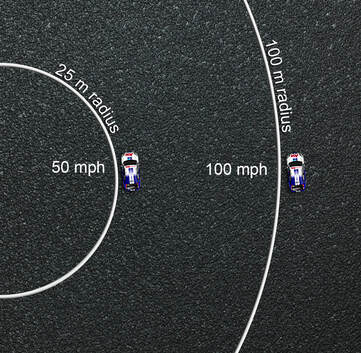
While there are many factors a driver must deal with while trail braking, the basic reason behind why it can improve corner entry performance is actually quite simple. Trail braking is about reducing forward momentum to allow the car to more quickly change directions. This is quite intuitive as well. The slower you are going, the more quickly you can turn. A car driving at the limit on a skidpad needs to travel slower on a smaller circle than they do on a larger one. But rather than just slow down in a straight line and then turn, a driver can do these at the same time. Put another way, trail braking doesn’t help a car turn better because it is decelerating, but rather because it has decelerated. The driver is just doing this simultaneously because it is more efficient. The Euler spiral path we learned about in the last article is simply the path a vehicle will take as it continuously slows down and drives at the limit on a smaller and smaller circle.
Of course, while the basic reason behind trail braking might be relatively simple, it can also have many other effects on the car and this has led some to believe these other effects are themselves the reason for trail braking. So in this article, we’re going to learn about and isolate all these factors by taking three different cars through a corner entry to see how they compare. We’ll see what we can learn as we examine different vehicle dynamics principles such as load transfer, slip angle, and more. This article will be more on the advanced side so I recommend you read through the linked articles along the way to make sure you are up to speed on the relevant concepts.
Before we begin our corner entry comparison, let’s take a look at some additional vehicle dynamics principles we’ll need to understand, starting with how a car actually steers. It might be intuitive to think that all steering force comes from just the front tires and that the rears just follow along. This is actually not the case however and the rear tires are being steered as well.
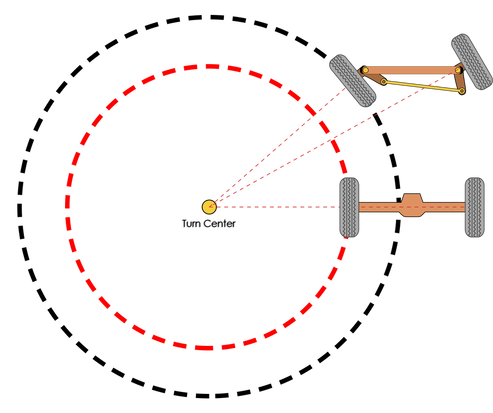
A tire generates lateral force when it is turned in relation to its direction of travel, so when the driver turns the steering wheel, the front tires begin to push the front of the vehicle over to the side. This sideways movement of the vehicle’s front then causes the rear wheels to become angled in relation to their direction of travel and they begin to generate lateral force and move inward as well. The movement of the rear of the car then further modifies the front tires' angle in a continuous feedback loop. This allows the vehicle to continue turning in a circle by just holding the steering wheel at the appropriate angle. Without the help of the rear tires, a car would only go in the direction the front tires are currently aimed. If you wish to experience this firsthand, take a ride in a Crazy Cart. It has casters that can remove all rear force when you pull the handle.
You can trace out the paths of the tires during a turn to see how the front and rear works together by each traveling on their own circles. The relative sizes of the circles is determined by a vehicle’s wheelbase. For a given steered angle at the front, a shorter wheelbase causes the car to turn on a smaller circle. A longer wheelbase does the opposite, causing the car to need more steering lock to achieve the same turn radius.
For comparison, a car with active four wheel-steering often dynamically adds or reduces the amount of rear tire steering to make a car more stable at high speeds like a long wheel base car, and then more maneuverable at low speeds like a short wheelbase car.
Understanding the importance of both the front and rear tires for steering is key, because this also determines how a car behaves once a driver reaches the limit. A car’s ability to turn will always be limited by whichever end has the least grip. For instance, if the front can corner at 1g, but the rear was capable of 1.1g, the car would still only do 1g of lateral force max. The front tires will steer up to their 1g max capacity and the rear of the car will then steer to match this, but have some capacity left over. This means the car will understeer at the limit.
If on the other hand, the front can do 1.1g, but the rear can only do 1g, the driver can steer the front up to that 1g limit and the rear will match it just fine, but 1g will be the car's maximum turning capability. Trying to use that remaining front tire capacity to steer any further and the rear will no longer be able to maintain its turning circle. The front to rear steering feedback loop we talked about has been broken and the car will begin to oversteer and spin. A key principle to understand here is that improving the ability of the front tires to generate lateral force doesn't help you turn any faster if the rear tires can't equal that force.
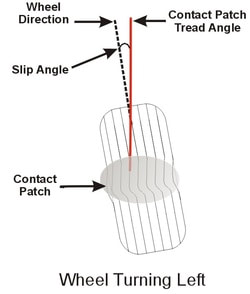
Next up, let's take a look at the concept of car rotation. Picture a car driving on a circular path while at the limit of the tires. This path will have a constant radius and this will give the car a constant rate of rotation as well as direction change. Rotation reflects which way the car is facing, but direction reflects which way it is actually moving. In comparison, a trail braking car will travel on a path of steadily reducing radius. This means it will have an increasing rate of rotation and direction change, but due to the effects of slip angle, these rates will not be equal. The car should increase in slip angle throughout entry causing the rotation rate to outpace the direction change. It's very important for a driver to be able to separate these two because it’s the direction change we are after as that is what is helping the car complete the corner faster. Although the additional rotation achieved through slip angle may look and feel similar, it has not actually increased the direction change any.
An example of how this can be a problem could be if a driver simply focuses on trying to increase rotation during entry, they might be inclined to release brakes and increase steering earlier than is ideal. This would cause a sudden increase in rotation (from slip angle), but at the expense of the rotation (from direction change) that would have been possible throughout the entire entry with a more optimized approach. We'll explore all this in detail throughout the lesson, but I wanted to go ahead and introduce the importance of separating these two factors up front.
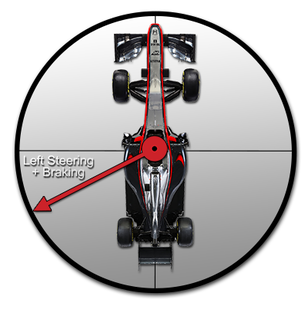 Traction Circle
 Now that we’ve gotten the basics out of the way, let’s introduce the cars we will be comparing. While very different in some regards, all three are the same basic car. They all have the same weight, the same tire grip, and the same weight distribution. The differences between them will all be aimed at isolating certain variables so that we can examine how each might affect trail braking.
The first car we will be looking at is our primary baseline car. Its key feature is that it has perfect balance. It has an ideal setup that allows both the front and rear to be used to the absolute maximum at all times during corner entry. With its perfect setup, this car can do 1.5g in braking or turning or any combination of those. In other words, if you remember the traction circle from the previous article, the circular outer rim would go to 1.5g. We’ll call this our 1.5g car.
We'll also be looking at a car that is exactly the same as our 1.5g car, except that it has a highly understeering setup. It has the brake bias set extremely far forward and also way too much roll resistance at the front as compared to the rear. Therefore, it will only do 1g in braking or turning or any combination of those. Because of its compromised setup, the outer rim of this car's traction circle would only go out to 1g, so we will call it our 1g car. To learn more about how different setup variables affect balance and grip, take a look at our racecar setup guide.
Lastly, we have the very special car that I talked about in the previous article. Although it has the same basic specs as the other two, this car is built with a chassis that hangs down below the level of the track so that the center of gravity is at the same level as the tire contact patches. This makes it so that this car will never experience any load transfer as it drives around a circuit, isolating one of our variables. Just like our 1.5g car, this one will remain perfectly balanced throughout corner entry, but since this car doesn’t experience any load transfer and evenly uses all four tires, it can do 2g in braking or cornering or any combination of those. Therefore, its traction circle will go out to 2g and we’ll call this car, you guessed it, our 2g car. For more info on why evenly loading tires increases grip, check out our tire science article where we discuss load sensitivity.
Now that we have our three cars, we’re going to send each through a 180-degree corner, giving them a full 90 degrees of entry. 90 degrees is the limit for entry or exit in an ideal racing line. Although it can be less, turning more than 90 degrees during the entry or exit of a corner indicates a line error and typically means it needs to be double-apexed. For an introduction to racing line optimization, take a look at our Racing Line Fundamentals lesson series. Also, just to keep everything on a level playing field and isolate another variable, all three cars will be driven by perfect drivers who know how to extract the maximum capacity from their car at all times.
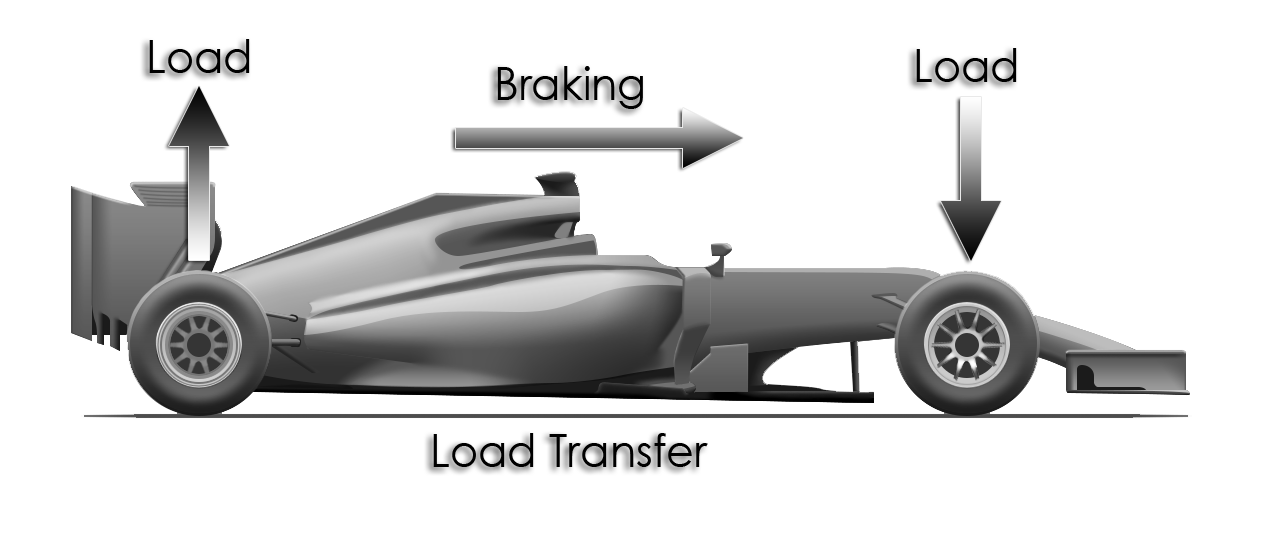
We’ll start our comparison right before turn-in, which would be at the end of the straightline threshold braking zone. Up first, our 1.5g car will be coming in at its full 1.5g of deceleration. This means the car will have maximum forward load transfer, increasing the capacity of the front tires to generate force while reducing it at the rear. Because the front tires are at full load and maxed out in deceleration, this also means they are at the maximum slip ratio they will achieve in this corner. The rear tires are also at the maximum slip ratio they will achieve in this corner, but it is less than the front's because they have less load and therefore less capacity.
At the other end of the spectrum, we have our 1g car whose speed right before turn-in will be lower than our other two cars. This car is also at the maximum deceleration it can achieve, but it has a brake bias set way too far forward so only the front tires are being used to their limit. The rear tires have a lot of force generating capacity left over. Because of this limited deceleration force, our 1g car is currently experiencing less forward load transfer than our 1.5g car.
Now that our cars are at their starting position and ready to start trail braking, remember that our drivers have left absolutely nothing on the table and have used the latest braking points possible. Anything other than a perfect corner entry from this point on will cause them to miss their apex. This not only means that the three drivers must keep their cars at their respective maximum limits at all times during the entry, but also that those limits are used perfectly with the ideal combination of braking and turning at every instant.
Let’s now look step by step at what is happening to the cars as trail braking begins. At the point of turn-in, the driver of our 1.5g car begins to increase steering while also starting to decrease brake pressure. This reduction in braking force has released some front tire capacity that is then used up by the steering forces being introduced. This keeps the front maxed out at the limit and, as we learned earlier, this steering at the front also introduces a steering force at the rear as the front starts to move over toward the center of the turn. Thankfully, the driver’s reduction in brake pressure has also released some tire capacity at the rear. This lets the rear accept the new lateral force that the front tires just introduced and it is able to stay at the limit as well.
In comparison, if the driver had went straight from maximum braking to maximum steering at turn-in, the tire forces would move directly to the side of the car and stay there throughout entry causing the car to instead travel on a circular path. Given the same braking point however, this circular path would cause the driver to miss the apex by a large margin, because as we cover in our ideal apex lesson, the direction of tire forces would be very far from the ideal direction. The important takeaway here is that, for optimal trail braking, not only must a driver keep the tire forces at the limit throughout entry, but also aim those forces correctly.
While properly directing the tire forces is the primary goal of a driver, let’s now take a moment to look at some other effects trail braking has on a car. First off, it’s useful to understand how the tires’ slip angles and slip ratios change throughout a 90-degree entry. Remember that at the point of turn-in, the tires were at their maximum slip ratio. As the braking force decreases and the turning force increases, the slip ratios will progressively decrease as the slip angles progressively increase. This will be a steady trade off from one to the other throughout entry with the peak slip angle being reached at the apex coinciding with the slip ratios finally reaching zero.
Slip angle and ratio changes are pretty straight forward, but load transfer during trail braking requires a bit more explanation. If you remember from earlier, as our 1.5g car began the turn, the front two tires were at maximum load and the rears were at minimum. As the force moves around to the side of the car throughout entry, the load on the tires moves around as well so that as we reach the apex, the two outside tires will be at maximum load and the two inside tires will be at minimum. That part is quite intuitive, but the way this translates into how the individual tire loads change might be less so. Because of the neutrally balanced setup on our 1.5g car, the outside front and inside rear will not see any change in load throughout this process. The outside front stays at maximum load, and the inside rear stays at minimum load throughout the entire entry. Although the load is transferring around the car, the only changes the actual tires experience is the load from the inside front is transferring diagonally across the car to the outside rear.
This behavior explains why even a perfectly balanced car isn’t able to perfectly maximize all four tires at every instant during entry. At least not without advanced control of each wheel’s braking force. For example, a typical racecar’s brake system can only control the front to rear bias. This means that with the proper brake bias we are able to optimize straightline braking as we only have forward load transfer to deal with, but the system can’t take the lateral load transfer into account once the trailbraking portion has started. Midway through entry, the driver needs about half braking and half turning force in order to continue on their ideal entry, but a significant amount of load and therefore capacity has left the inside front and went to the outside rear. In comparison, the outside front is still at full load, but whatever braking force the driver requests from this tire also has to come from the more lightly loaded inside front tire. This is why you will typically see the inside front lockup first when a driver pushes their entry to the very limit.
Speaking of minimizing load transfer in the design stage, it’s time we move on now and look at our special, low-hanging 2g car. I included this car, because as we just discussed, there are some common misunderstandings dealing with load transfer so I thought it would be useful to compare one that takes it completely out of the equation. Remember that our cars all have the same ideal apex and that our drivers’ goals are to reach that apex in the shortest time possible. They accomplish this by maximizing the net force in the ideal direction, which results in a smooth progression around the car during corner entry like the hand of a clock. This progression of force is what causes the cars to travel on an Euler spiral shaped path and since the end results (the apex) needs to be the same for all cars, the force progression and therefore path needs to be the same as well.
The amount of load transfer a car experiences doesn’t affect this process. As we’ve learned, a change in load transfer would only change the maximum force achieved, and this only changes the speed at which everything takes place. The car and its clock hand would move slower or faster, so to speak. This is in the same way though, that any change in maximum grip such as reduced weight or stickier tires works. The key takeaway here is at these factors don’t affect our drivers’ goals. For any given point during their entries, the drivers of our 1.5g and 2g car would be aiming their combined tire forces in the exact same direction. The only significant difference they would experience would be that the driver of the 2g car would be going faster and being pressed into their seat and harness at the same angle, but with greater force.
About the only other meaningful difference these two drivers might notice is that, depending on tire construction, the 2g car might be at a lower slip angle and therefore rotated less as it approaches the apex. This would be a result of the lower outside tire loads. Remember though, the direction of travel for both cars is the same at any point, any extra rotation from slip angle would just be a side effect in the same way that load transfer is. Although it may look like the 1.5g car has turned more at the apex because it is rotated more, they both have exactly the same amount of turning left to do during corner exit. Remember that it's very important to be able to sense the difference between rotation from slip angle and rotation from change of direction.
Now that we have a good handle on the basic physics of trail braking, I want to take a minute to briefly discuss the two variations a driver will experience when applying these principles to other corners. The first variation is when we have a corner where we don’t need to go to the full 90-degrees where braking has fully tapered off. The second is when our entry speed is low enough that we don’t need to begin with straightline braking. These two situations can often go hand in hand, so we can tackle them both by looking at a typical high-speed corner. High-speed corners are often low angle and fast enough where the driver enters at full-throttle.
Our second variation is that some corners, especially high-speed ones, often don’t require straight-line braking before turn-in. To understand how to handle this, first visualize how you would drive the corner if your entry speed were high enough that you did need straightline braking first. For each point along the entry, a given car would have a certain ideal speed, steering, and braking pressure. Now though, instead of decelerating to each of those points, you would accelerate to one of them, and then continue on decelerating as usual from there. So starting from the beginning of the corner, you would follow the exact same line, but instead of braking first, you would continue to accelerate into the spiral path, but at the point your speed reaches what it would have been had you been decelerating, you switch to trail-braking from then on. Once you begin decelerating, your speed, steering, and brake pressure should ideally match what it would have been if you had begun the corner in the typical fashion. Notice however, that this would require going straight from full throttle to a combination of braking and steering, so again we introduce a battle between the ideal and what the car and driver can actually achieve.
The key points to remember with partial trailbraking is that your entry speed only affects where exactly deceleration begins and the angle of the corner then determines how much of the spiral you will use. All other principles remain the same.
Before moving on to look at our terminally understeering final car, I want to go over another effect that trail braking has that we haven’t covered yet. Our first two cars remained perfectly balanced throughout entry because their setups allowed this and our perfect drivers had the control to maintain it. So on one hand, it’s important to understand that there is nothing inherent in trail braking that causes a steady-state balance shift. Assuming a car has the adjustment range, it can be set up to have varying amounts of understeer or oversteer during entry. On the other hand however, the basic trail braking control inputs of releasing brakes while increasing steering can cause a transient balance shift toward oversteer. This sometimes very powerful effect has led to many corner entry spins.
The effect we are talking about here is called trail braking induced oversteer and here’s how it works. We’ve learned that deceleration causes forward load transfer. During trail braking, the forward load transfer increases the capacity of the front tires while reducing it at the rear. This by itself doesn’t directly shift the car’s balance however, because this extra capacity at the front is being used up by the very braking that is creating that deceleration. That is why a car's traction circle is rounded, not something like an hourglass shape where increased deceleration and therefore load transfer actually improved a car's ability to turn. For example, while forward load transfer in our 1.5g car does increase front capacity, this also progressively reduces its turning ability, as more and more of that additional force capacity is needed for braking. If the driver tried to move brake bias rearward in an effort to use that additional front capacity for turning, they would instead actually reduce it because the added rear braking force further removed the rear tires' ability to turn and therefore match the turning force from the front. Remember that improving the ability of the front tires to generate lateral force doesn't help you turn any faster if the rear tires can't equal that force. A balanced setup and brake bias is what will allow a driver to maximize turning and deceleration during trail braking.
Don’t think of trail braking induced oversteer as just a mistake to be avoided however, it is simply an effect that a driver must learn to take into account. A high-level driver with a balanced car should ideally be right at the limit of the front and rear tires during entry so even just the relatively small brake and steering modulations done while testing for the limit can induce small amounts of oversteer. Plus, while the 90-degree entry we are looking at in this article allows a smooth transition off the brakes, remember that a lower angle corner would ideally need a sudden brake release as the spiral is cut off and we begin corner exit. It would be up to the driver how close to the ideal they can push the car without inducing too much oversteer.
Now armed with our knowledge of trail braking induced oversteer, let’s take a look at our final car’s corner entry. Back in our terminally understeering 1g car, we will again see the exact same line as our other two cars, because as we’ve learned, the level of grip doesn’t affect our driver’s goals, just the speed with which they take place. In comparison to our 1.5g car, our 1g car will experience less load transfer because of the reduced force as well as a much lower slip angle at the rear because the rear tires are not near the limit. Overall however, it will basically look the same as our other two cars, only slower.
The big question here then is, whether our driver can somehow use trail braking induced oversteer to take advantage of all that unused rear capacity. The answer is unfortunately no. While it is actually possible for a driver to achieve a momentary spike above the steady state lateral limit by inducing oversteer in an understeering car, that force spike would be aimed too far toward the center of the turn as if the driver were doing a slower, more circular entry. Remember, it is increased net force in the ideal direction that reduces times. Unless we are talking about something like in car adjustable anti-roll bars or brake bias, there is simply nothing even the perfect driver of our understeering car can do to cure their balance issues until they get back to pits. Also, keep in mind that trail braking is already increasing the car’s rotation rate and our driver has a full time job of keeping the tires maximized in the ideal direction to accomplish this. Any deviations from those ideal control inputs will inherently cause a time penalty. Although trying to induce extra rotation in an understeering car might feel faster, it will actually be slower. Again, it's very important to be able to sense the difference between rotation from slip angle and rotation from change of direction. But while inducing oversteer is not something a driver would want to purposefully do during regular circuit driving, some types of racing such as off-road rally do actually call for just such techniques.
Line theory show us that ideally, we should always trail brake when deceleration is needed during corner entry. This does require that we break down that statement and make sure we understand its exact meaning, however.
First off, as we learned in part 1, trail braking would more accurately be called “decelerating to the apex.” Even though a driver might not touch the brakes, full throttle into a corner with a brief lift right before the apex follows the same principles as a full trail braking entry. As we learned earlier, the primary difference is simply where the driver begins slowing down. In both cases however, the lines and control inputs used once deceleration begins should ideally be identical.
We also, therefore, need to understand exactly what an apex is. An apex is the most limiting point on the inside of a corner. Even though there is typically a static obstruction like a cone or track curbing, the exact apex point is at least partially dynamic as a driver’s variations require they constantly re-optimize their racing line. A large error could even cause the apex to become an imaginary point out in the middle of the track if a driver has missed their braking point and needs to update their line to compensate. Sometimes however, even the obstruction is dynamic. There could be another car on the inside of the corner during a race, or you could be driving in the wet and the apex is now the outside edge of the slippery worn in racing line. Just remember that wherever a corner’s inside limit is currently located, the driver should ideally decelerate to and accelerate from this point.
Being able to properly identify an apex is also important because while you should ideally decelerate to the apex during corner entry, knowing when you actually are in a corner entry can be very tricky. I’ve broken down nearly 50 different tracks for Track Notes, and properly assigning the four types of corners can sometimes be quite the puzzle. For instance, while the center of a decreasing radius double apex will require deceleration and can feel almost exactly like a typical corner entry, it’s technically not one and would have its own unique goals. Once you are able to identify the type of corner you are dealing with however, just remember that a driver should only be trail braking during the entry to a standard corner, the entry to each apex of a chicane, and the initial entry to a double apex.
Lastly, it’s vital that a driver understand the significance of the word ideally. I use this word a lot and its importance might not initially be apparent. When I say you should ideally trail brake whenever deceleration is needed during corner entry, I’m talking about the theoretical optimum. It means that if a corner is done perfectly, you will see the principles discussed in this article take place. It doesn’t mean a driver should simply try to slow down to every apex. It's a goal to strive for, not a secret technique that will immediately take someone to the top of the podium. Most drivers that begin learning the physics of racing initially try to strictly follow every rule of line theory. This is completely understandable and is an important part of the process. While understanding the rules does give a driver confidence in what they are doing, and by itself, can take a driver quite far, if they wish to continue progressing, they will need to be okay with breaking the rules for a while. Eventually, I try to get a driver to reach an almost purely instinctual level where they are no longer even paying attention to the rules as they drive. While you can see all the rules at work in their driving, they’ve learned to control a car based on directly feeling the forces that created those rules. Not because they are consciously following them.
A big part of this training process is learning the cost of different mistakes. If I’m reviewing the race lap of a high-level driver and I see the speed trace go flat a bit before the apex in a high-speed corner, I don’t consider this an error even though technically it is one. Instead, as long as I know they understand the ideal, I realize they are just “erring on the side of.” Even the best drivers have some variance in their performance, and while sometimes they do nail that ideal entry and the sector times reflect it, on average, biasing acceleration prior to the apex in a high speed corner costs less time than always going for a perfect apex, but sometimes missing it entirely. This doesn’t mean they are purposefully moving their throttle application point away from the ideal however. At that level of skill, a driver isn’t focusing on preset control inputs. They are instead focusing on the car and maximizing its overall movement through the corner. Any “erring on the side of” happens automatically and subconsciously.
At the other end of the spectrum, a novice driver in a high-speed corner may be so uncomfortable trail braking that they will produce better times by turning in under light braking and going to maintenance throttle well before the apex. While this is very far from the ideal, it is often faster for a novice driver than trying to decelerate to the apex, but dropping well below the limit and severely over-slowing the corner. This is why the beginning trail braking training exercises I have drivers do are primarily not time-improvement based. Instead, they focus on other goals until their skills reach the level where decelerating to the apex is actually faster, not slower.
I hope you enjoyed this article series. If you are interested in a complete guide to the physics of racing, we also offer The Science of Speed book series, available through our bookstore or at popular retailers such as Amazon.
by Adam Brouillard

